
I have bought an DS409 a few years ago and I felt quite disappointed not to get every update brought by DSM 5 then 6.
One easy solution would be to buy a new NAS but, to be honnest, my current one is still working fine (and I have modified it a lot).
Goal of this post will be to show how to upgrade and as well, what is the process to understand if you can upgrade.
First, you need to know what is the CPU of your NAS to install a compatible DSM, one excellent resource:
https://github.com/SynoCommunity/spksrc/wiki/Architecture-per-Synology-model
also available here if the first source stop working:
https://www.synology.com/en-us/knowledgebase/DSM/tutorial/General/What_kind_of_CPU_does_my_NAS_have
For my NAS, I found that it embed a 88f6281 (DS409 – synology_88f6281_409) and wonderful information, a newer version of the 4 slot NAS embed the same CPU (DS411j – synology_88f6281_411j).
So the solution will be to trick my NAS to believe it is a DS411j instead of a DS409.
DSM rely on the file /etc.defaults/synoinfo.conf to recognize the NAS model it is.
In these file, I have replace the model reference in the unique line:
unique="synology_88f6281_409"
by
unique="synology_88f6281_411j"
you then just save the file, connect to the web interface and launch the update process, it will then propose to migrate to DSM V5.
In order to reach DSM V6 you will have to go through a few updates, there are milestones version you cannot skip apparently.
For the upgrade to DSM 5.2.5565, I have encountered an error while going through the installation, the solution was to provide manually the pat file of the update.
All DSM releases are available here:
https://dedl.synology.com/download/DSM/release/
you just need to download the right file, in my case it was:
https://dedl.synology.com/download/DSM/release/5.2/5565/DSM_DS411j_5565.pat
Since then, I am using DSM 6.0 with no regression for my usage.
Known issues are:
- found on forum: esata not working directly
in /etc.defaults/synoinfo.conf
Add
supportESATA="yes"under the line: support_s2s=”yes”alter the line esataportcfg=”0x0″ to
esataportcfg="0x10"
- If you were connecting on SSH using root account (boooh) it will not work anymore, you should connect with your admin account you are using to connect to the webinterface (and sudo will do the rest)
if I find any other issues or tips and tricks it will be added here.
So now that it’s been a while, how has this held up? I’m considering it for my DS409. Did you add additional RAM? If not, did that affect performance at all?
The NAS is still working fine and I haven’t encountered any issue since the upgrade.
I continue to receive the DSM update (current version is Version: 6.2-23739-2 (2018-07-12)).
I have not added any additional RAM and didn’t see any performance impact at first.
Now, I start to have some performance issue (linked mostly with nodejs server and latest java version), it is mostly visible when I use the web interface, it is slower than before but no impact on network transfer speed, only the web interface is slower.
Hi there,
discovered your post yesterday and tried it on my DS209 which was stuck with DSM 4.22
Upgraded to DSM 6.2.1-23824 Update 6 now by telling my DS209 it’s a DS212j. So far I see no issues – as written before the CPU goes more towards 100% than before which should be related due to the heavy HTML5 UI. I’ll try out more in the next days!
Anyway, thanks a bunch, no need to buy a new Diskstation!
How did you manage to upgrade the 209? Mine doesn’t see any updates when I change the model number in the syncinfo.conf. It still sees it as a DS209j and if I reboot after changing this I need to reinstall DSM 4.22
Depend on your NAS model,
if your nas is a DS209J then the CPU is a ppc824x, no model later received this CPU so there is no DSM package update possible.
if it is a DS209 then the CPU is a 88f6281 onboarded as well on DS210j, DS211j and DS212j and it should work as described in the article.
I see this thread is still active! Now I run it since more than a year and there is only one thing I noticed:
The energy plan only offers the option of “shut down” but not anymore of “start up” timing. Which means I need to push the power button for turning it on. Not severe but any hints where I could look?
It’s strange indeed, just checked on my NAS (DS409 now running as DS411j with DSM 6.2.3-25426) and I have both Startup and Shutdown available.
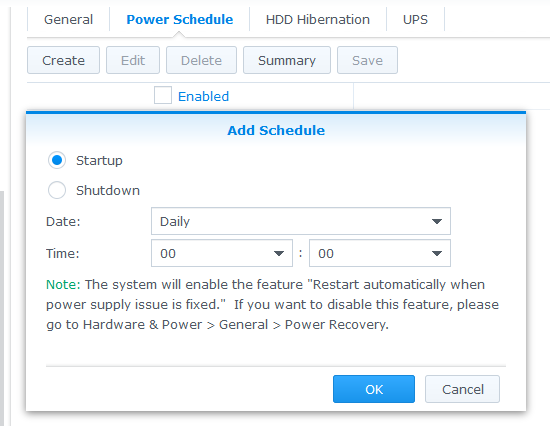
When you say you don’t have the option, is it that “start up” is greyed or is not here at all?
Here is a screen of my power schedule
Hi HackGins,
thanks for answering. Yes indeed it is strange. This is how it looks for me: https://ibb.co/ZdW77DM (sorry, it seems I can’t paste a picture here).
Any idea?
Just had a quick look but I think I might have an idea we give a try.
Power Scheduler use the file /etc/power_sched.conf to store information about startup and shutdown time.
I tried to setup a startup and a shutdown and I got that when I cat the power_sched.conf:
[Power On schedule]
25100288
[Power Off schedule]
25101568
It seems to be a hexadecimal representation of the rules selected through the interface. (25101568 in hex is 17F0500 and it was set for 05:00 in the morning, 25100288 is 17F0000 and it was set to 00:00, I see a pattern here 🙂 )
Can you check:
1) if you have the [Power On Schedule] in the file
2) what happens when you add a power on schedule and go back to the interface (when I did a modification through VI, I closed the control panel and reopened it and it was directly visible)
To setup the time you would like for the startup, set it up for the shutdown and copy the value to the poweron.
Hi HackGins,
seems I need to reply to this thread your last reply doesn’t give me a “reply” option.
THANK YOU for looking into it and apologies for the late reply. I have such a file and the startup section [Power O schedule] was not populated. I copied your entries for both sections and saved. Now I have the shutdown time set to 5am. So the file itself works. However, there still isn’t a startup time in the GUI.
I have set it now to 25104384 (10:00) and 25109248 (23:00) respectively. Maybe the GUI is just broken and it will power up by the file entries… I’ll feed back!
Ok, it seems it didn’t work. I’ll keep the setting and see if it powers up at any time. Since I have another DS214 I don’t need it every day.
This Idea sounds very good. I do have a 409+, do you think this hack would work with a 409+, too?
quick answer, not it would not work.
a 409+ has a CPU ppc853x instead of a 88f6281 (armv5) for 409.
Here is a link to all model sharing this CPU
https://github.com/SynoCommunity/spksrc/wiki/Architecture-per-Synology-model#ppc853x
You’ll see that the 410 is the only 4 disk nas with the same CPU so it should be possible to transform your 409+ to a 410 but I don’t know if the 410 still receive DSM update or not
UPDATE:
DS410 latest firmware is 5.2
DS409+ latest firmware is 4.2
https://www.synology.com/fr-fr/support/download/DS410#firmware
so it should be possible to update to 5.2 but not a later version, not sure it would bring enough value then.
Same NAS here…do you think the 5.2 upgrade is worthy?
I am trying to upgrade my 409+ to 410.
I keep getting “file is corrupted”.
All I have done is open the .pat file with notepad and chance 410 to 409+.
The .pat file is a notepad file
to do so, you should update the synoinfo.conf in order to trick your NAS into believing it is a 410.
Update files are usually checked with a hash signature so any modification will lead to corruption.
you should have a line that should look like: unique=”synology_ppc853x_409+” which should be replaced by unique=”synology_ppc853x_410″
but if it works it will only allow you to update until DSM 5.2 not later as the 410 is not supported anymore for firmware update.
Have you got it?
I still have no access to change the “unique line”
FWIW, just editing the unique= attributed for my DS209 didn’t work. I kept ending up with the DS209 in a ‘migrating’ status.
Once I edit synobios=”ds211j” (also in /etc.defaults/synoinfi.conf) everything worked.
Here was my upgrade path:
modify synoinfo.conf with:
unique=”synology_88f6281_211j”
and
synobios=”ds211j”
then manual upgrades as below:
4.2-3211 -> 4.3-3827 -> 5.0-4528 -> 5.2-5967 -> 6.0.3-8754 -> 6.2.3-25423
My old DS209 is now a great hyper backup vault for my 916+
Hi did you updated synobios=”ds211j” ?
after I update synoinfo.conf and rebooted, synology assistand sees it as a new model but stack in migration status and not let me use new .pat files and also can’t use the original .pat file due to version mismatch. everyone says SSH and change it but SSH does not work anymore, port 22 unaccessable and I can’t go into webman anymore.
Do you have any idea how can I change synobios=”ds211j” ? I can only do telnet so far….thanks.
Tried this on my 209 and it says
“synoinfo.conf” File is read only
I logged in as admin but cant seem to get past this issue.
Any ideas?
The file synoinfo.conf belongs to root and admin does not have the right to update it, you need to open it as root.
To do so, if you do this through SSH, you should sudo your command
(ex:
sudo vi synoinfo.conf
it will prompt for password which is the same than the admin one by default)
Hope it helps
I was so happy to find this! But I couldn’t get it to work and was wondering if you had any insight. I have a DS409. I made three attempts:
Attempt 1: SSH in. Changed unique=”synology_88f6281_409″ to unique=”synology_88f6281_411j” Saved. Restarted via web interface.
Result 1: Wouldn’t let me log back in via the web interface. Had to reinstall DSM 4.2 via the synology assistant.
Attempt 2: Same as attempt 1, but I also changed synobios=”ds409” to synobios=”ds411j”
Result 2: Same as result 1.
Attempt 3: Same as attempt 2, but I also changed upnpmodelname=”DS409″ to upnpmodelname=”DS411j”
Result 3: Same as result 1.
Do you have any idea what I’m doing wrong? My DSM is currently 4.2-3255.
I have a new synology NAS coming and I need to find a way to migrate the data from this to the new one, but apparently I need a v5+ version of DSM to do it easily. Really appreciate the help.
Ouch, tough question.
to be honest I don’t really see what is going wrong.
The only difference I see is that I have not restarted the NAS after updating the synoinfo.conf file, I have launched directly the update from the web interface.
When you did the 1st attempt, were you still able to connect through SSH? was it only the web interface that was rejecting the credentials?
Another potential difference as well is that I am using another admin account (not admin or root). Have you tried to connect with other account to the web interface?
@Stewart
Something new ?
Hello
I got same issues as you.
Recovered with syno assistant and DSM_DS409_3259.pat
Then I changed agaain /etc.defaults/synoinfo.conf with “*_411j”.
But Don’t reboot !!!!
Then I did a manual update with DSM_DS411j_3827.pat
And after that I manually updated in this order
DSM_DS411j_4458.pat
DSM_DS411j_5565.pat
DSM_DS411j_25426.pat
synology_88f6281_411j.pat (this is the name for 5426-2)
Then used interface automated updates to get 6.2
I also modified the esata ports as adviced here.
So far no issue …
To get the pat files go to syno download center select 411j NAS and use the firmware to firmware upgrade wizard in the bottom of the page
No need to modify other files only synoinfo.conf
Cheers
Thank you for this information!
The important thing is “not to reboot the Syn!”
Hi, thanks for this article.
I made the stuff on a DS210j (DSM5.2) and “upgraded” it to DS211j.
I had some issues but finally I can have the last DSM version (6.2.3).
But at this time, I can’t connect to my synology account to activate Quickconnect.
People from Synology support told me that S/N, Mac address and synology NAS are not matching in order to connect to Synology account in DSM.
Did you have such issue ?
And as I really need Quickconnect (this NAS will go in another place and I don’t want to play with the ISP box), I’m trying to going back to DS210j but not sure it will work.
Any try ?
Thanks for your help.
I have also tried upgrading my DS210j from DSM 5.2-5967 Update 9 to DSM 6.0-8754 but it offers the upgrade and at 2% it says “Incompatible upgrade”.
I’ve changed the above ID and also “synobios”, but it didn’t work. I haven’t rebooted yet and I did try logging out and back in to reinitialise the session but that didn’t help.
Hi,
I have the same problem with my DS1010+ -> DS1511+.
Could you solve this “Incompatible upgrade” issue ?
thx.
mike
Hello Mike,
I also have a DS1010+ and ran into the same issue…
Did you manage to solve the problem?
Please let me know. Thank you, Sir!
to fix the incompatible upgrade error – – you need to downgrade (with ds210j firmware) to 4.1. then upgrade with ds211j firmware to 4.2
https://gathering.tweakers.net/forum/list_messages/1583779/3
you only need to change the 1st line in etc.defaults/sysinfo.conf (not synobios)
use root (not admin), this gives you write privilege’s (or use sudo)
downgrade:
http://archive.grantzau.com/showcase/blog/blog.asp?ID=52
https://www.tumfatig.net/20150322/roll-back-from-dsm-5-to-4/
you’ll brick your NAS if you have a + model
I believe synology said quickconnect and ddns won’t woek
Thanks for the very inspirational post.
I’m considering upgrading a DS110j to a DS112j which should be possible when considering your first (Github) link. However, the second (Synology) link mentions that the models have different CPU’s, but identical “spksrc architectures” mentioned as “88f628x”.
Do you think it’ll work out or do the CPU’s need to be EXACTLY identical ?
I bricked my ds409+ 🙁
did it as above, tried to install 4.3-3827 but the dsm does not boot.
Diskstation is booting but DSM does not start, Status led is orange, the other Lights are green…
what can i do now?
Hello, I just upgraded my DS209 to DS212j and 6.2.3. One thing that was not clear on your post was that I was supposed to use Putty to SSH into my DS209. I used your tips along with a youtube video I found. It took a bit of figuring but got it to work.
For others that need more of a visual here is what I used. In the comments there is a “Buddy Thompson” who shares some additional information on getting this to work.
https://www.youtube.com/watch?v=FtpZoXVY8OY
Basically you use Putty to SSH into your DS209. You tell your DS209 that it’s now a DS212j and save it’s conf file. Then download the DS212j DSM and install it. worked great. Thanks again.
Hi, thanks for the post!
I have a DS-508 running DSM 4.0. I need to upgrade it because its OpenSSL libs are too old (1.0.0n), vulnerable, and do not support the current TLS versions anymore. Just updating OpenSSL seems unfeasible, as there are many dependencies to be rebuilt.
The DS508 uses a PowerPC MPC8543 processor; there are no newer models using this same CPU. However, the DS410 model uses the MPC8533E CPU model, which seems (to me) very similar.
Are you aware of successful cases of this kind of “not-exactly the same CPU” upgrades? I’m afraid of bricking my old-timer…
Regards!
Hi
Just had a quick look at the spec of both CPU and there are few differences (L2 cache size for example) as they are considered different family (PPC854 vs PPC853).
Having a look into Synology Tool Chain source code (tool suite used to compile the source code to be able to run on the target CPU), the DSM 4.0 is the latest one supporting the PPC 854x family (starting from 4.1 only the 853x is included), you can access the source code here: https://sourceforge.net/projects/dsgpl/files/Tool%20Chain/
Sorry but I don’t see a solution with my current competence level.
Depending on the expected usage, could it be a solution to install chroot to have a 2nd version of openssl running in the chroot jail?
Hi HackGins,
Thanks for the article and successfully upgrade my DS209 to DSM 6.2 which continue it’s life. I followed the same today for my DS209+II by changing the synoinfo.conf to DS210+ but after it load the newer pat file and reboot, it get into migratable states. Now I can’t upgrade or reinstall the OS as it keep saying incompatile pat files. Any idea how to get this box back or continue upgrade to the newer version? I’m able to get onto the machine via telnet but just don’t see VI anymore…so even not able to modify back to DS209. Appreciate if you got any thought or instruction. Thanks.
Hi,
tough question.
I just had a quick look, and it seems that you are not the only one with this issue.
I have not found anyone succeeding on migrating DS209+ to a later version with a soft way (ie. not including additional hardware).
I have found someone who succeeded in unbricking apparently (in French but google translation can help here) hope this helps
http://mesbidouillesinformatiques.blogspot.com/2016/02/unbrick-debriquer-mon-synology-ds209.html
Here is a quick version of the steps followed:
Dear Author,
I managed to brick my DS409+ by editing the unique value. I managed to reinstall from Synology Assistant, it booted okay. After the first reboot it wouldn’t boot again, synology assistant says it’s a DS410, I can’t reinstall the 409+ firmware, and for some reason I get ‘Bad Magic Number’ error on serial console. I think I need to reflash zImage and rd.bin, but I can’t seem to find the correct memory addresses. I hope you can help me.
Thanks for your reply in advance,
Máté
Hi,
I have never bricked a NAS before, lucky me, so I am not sure how I would manage it.
On your specific issue, I guess you don’t have any access to the NAS filesystems or any backup available?
The right memory address seems to be written in message logs (/var/log/messages, history files are compressed as GZ or XZ).
In my files I have found (but it is a DS409 not a DS409+):
Jan 9 22:16:20 updater: PATCHINFO: part[zImage] file[zImage] start = [0xF8080000] size[0x2097152] datalen=[0x0017F870] nblock[24] balance[8] fneedupdate[1]
Jan 9 22:16:20 updater: PATCHINFO: part[rd.gz] file[rd.bin] start = [0xF8280000] size[0x1310720] datalen=[0x000E3CFB] nblock[15] balance[5] fneedupdate[1]
I have search to find more about the step you have already performed and stumbled upon some blog articles I think you have already checked:
https://translate.google.com/translate?sl=auto&tl=en&u=https://www.huubmons.nl/multimedia/nas/17-networked-attached-storage/75-nas-synology-unbrick
http://www.translatetheweb.com/?from=&to=en&ref=TVert&refd=www.bing.com&dl=fr&rr=DC&a=http%3a%2f%2fmesbidouillesinformatiques.blogspot.com%2f
In those articles I have found the information for the DS209+ which seems quite similar, but I think you might have already tried all that.
0xffc00000 : zImage
0xffe00000 : rd.bin
Hi,
Yes I have seen these articles, unfortunately none of them helped. I tried flashing zImage and rd.bin to the mentioned memory adresses, but I get this as output at start:
## Booting image at ffc00000 …
Bad Magic Number
I don’t know what does that Magic Number stand for, so I have no way of figuring out how to fix it.
Can I somehow reflash DSM through TFTP? I hope that’s a thing.
I’m completely lost with this unfortunately.
Thanks for your help so far,
Máté
Thx for replying, just few questions:
– what is the result when you execute printenv in the serial console?
– can you list the command you are using to flash zimage and the result you have?
If you restart the ds409slim after changing the value but before upgrading it will stop responding. I just did a soft reset and reloaded DSM. I’m successfully upgrading it now by changing the value and initiating a manual DSM update.
Feb 2021 Great work on this forum, upgraded my DS409 Slim I gor foa song on ebay to later V4.3, then to V5.xxx and may take the step to V6.xxx. Still analyising..
Hi, I’ve upgraded my DS209 to DS211j. The performance isn’t as good as expected, is there a way to optimize it and speed it up?
Thank god for this. took me 2 days to figure it all out, but mij 409+ is now upgrading.
So Thank you all for al the information in this thread. i forgot to document my moves and changes, but it all works!!!
hello!
Unfortunately i was not successful! I have ds209 with dsm 4.2-3259.
i have modified the synoinfo.conf file (either only the first row later the other two occurrences as well) but i was not able to install the next step DSM upgrade.
If i check the menu/system information the model name was always DS209, never changed to DS211j
i haven’t rebooted the system. What did i make wrong?
thanks in advance
NT
Although i have modified the conf file the command “uname -a” says it is a ds209 :-((( not ds211j!
Yessssss!!!
it seems to work!
the problem was the following:
i have modified the etc/synoinfo.conf file which did nothing
but if i change the etc.defaults/synoinfo.conf it works!!!
Hi which dsm have you installed ? Thanks
I think i temporarily bricked my ds409, i could only ping it, no network connections on any port when going through the router. I followed the instructions, i edited the file, but then lost internet, so I couldn’t start the firmware upgrade, phone hotspot didn’t help, had to shutdown the ds409 a few times.
So i’d say right after editing the file you need to flash it as soon as you can. factory reset was no help to recover, synology assistant couldn’t find it.
Just out of desperation i connected my laptop network jack directly to the network jack on the ds409, made sure ethernet adapter settings tcp/ipv4 did not have custom configs. I launched Synology assistant just like the other times, but it finally detected the ds409 at a 169.* address, it prompted me to reflash the firmware, i just used the previously downloaded ds409 firmware to restore it 1st.
then i started editing the file again
but I also changed upnpmodelname=”DS411j”, it changes the dsm web interface description of your nas, then manually flashed from the web interface the ds411j file i downloaded. everything is up and running, checks are all positive.